How to Fix Muscle Imbalances and Muscle Dysfunction
Use functional training to heal and repair these key causes of chronic pain and movement impairment.
Table of Contents
- A Quick Primer on How to Identify Muscle Imbalances
- How Do You Fix Joint Muscle Imbalances?
- How Do You Fix Symmetry Muscle Imbalances?
- A Quick Primer on How to Identify Muscle Dysfunction
- How Do You Fix Dysfunctional Muscles?
- Sensations to Pay Special Attention to When Fixing Muscle Imbalance and Dysfunction
- 1) Sharp Sensations in the Muscle You’re Activating, or Uncontrollable Jitters
- 2) You Feel the Wrong Muscles Activate
- 3) Pinching or Jamming at the Joints
- How Long Does it Take to Fix Dysfunctional and Imbalanced Muscles?
- Keep Experimenting with Functional Movement
This article covers strategies I’ve developed to fix muscle dysfunction and muscle imbalances, based on observations and experiments over thousands of client sessions at Upright Health. These are strategies that have helped my clients avoid allegedly "unavoidable" surgeries.
We’ll also cover specific sensations that arise when fixing dysfunctional muscles and what to do about them.
Your body is a complex, nonlinear system that requires observation and calibration on an individual basis. After reading this article, you’ll be able to safely explore and expand your own body's limits.
A Quick Primer on How to Identify Muscle Imbalances
Before you get started though, I recommend you read my article on How to Identify Muscle Imbalances and Muscle Dysfunction. It introduces you to the basics of muscle function and muscle balance, explaining helpful key concepts you should know before you get started.
Here’s a quick refresher from that article: Muscle imbalance is when you have a clear difference in the function of various muscles around one joint, or when there is a clear difference in the same muscles on different sides of the body. For example, the quadriceps on the right leg are weaker than the quadriceps on the left leg.
The 2 Types of Muscle Imbalance
There are joint muscle imbalances and symmetry muscle imbalances.
- Joint muscle imbalance has to do with the relationship between muscles that surround one specific joint (or multiple specific joints). This imbalance is a combination of two things:
- The strength of the muscles in question does not allow for smooth, full, and pain-free motion of the joint.
- The extensibility, or ability to lengthen, of the muscles in question does not allow for smooth, full, and pain-free motion of the joint.
- The strength of the muscles in question does not allow for smooth, full, and pain-free motion of the joint.
- Symmetry muscle imbalance has to do with the relative strength or extensibility of the same muscle on both sides of the body. For example:

Can you see the difference in muscle development on the left and right sides?
How Do You Fix Joint Muscle Imbalances?
The short answer is that you identify what specific challenges your muscles face, and then you address those challenges head-on. I’ll quickly sum up the basics here, then we’ll get into specific exercises later.
To fix a joint muscle imbalance, do exercises that target the weak or stiff muscles.
For example, if your chest and anterior shoulder muscles are strong and can lengthen and shorten without issue, but your posterior shoulder muscles are weak and have trouble shortening, resulting in a rounded shoulder posture, do more exercises that improve the ability of your posterior shoulder muscles to shorten against resistance. This means you're building both strength and shortening ability.
Or, if your hip flexors are short and weak, your glutes may be stuck in a lengthened position and are also weak (a classic problem with sitting all day). In this case, train your hip flexors to get longer AND stronger, and train your glutes to get shorter AND stronger (without sacrificing their ability to get long as well).
How Do You Fix Symmetry Muscle Imbalances?
If you find a symmetry muscle imbalance, you pick exercises to target the specific weaknesses or extensibility issues you're experiencing.
For example, if you have a weak butt muscle on one side, do extra training for that weak side. Do exercises that force the weak or stiff muscles to work independently of the other side. A simple example would be a single-leg glute bridge (in the video below). With a unilateral exercise like this, you can train the weaker side to catch up.
Single-Leg Glute Bridges train the two sides of your butt independently.
If you have a stiffer set of hamstrings on one side, do extra hamstring stretching and lengthened strength work on that side. For example:
 Every man I've ever met has one stiffer, shorter hamstring side (unless they've actively trained to get rid of it).
Muscle Imbalance Cheat Sheet
In summary...
- If something is weaker on one side of the body or one side of a joint, you strengthen the weaker side by doing extra strength work for it. A simple rule of thumb is to do an extra set for the target side.
If a muscle is not extensible, you lengthen it (and also strengthen it when it's lengthened). A simple rule of thumb is to do an extra set of stretching with isometric contractions on that side. For example, in a hamstring stretch, rather than just relaxing into a deeper stretch, actively contract the hamstrings in that lengthened position.
A Quick Primer on How to Identify Muscle Dysfunction
Finding and fixing muscle imbalances is just the first layer of training your body.
Sometimes you’ll discover that your hip flexors are super weak on both sides, and within that you still have one side that is weaker.
In this case, restoring symmetry doesn’t fully solve your problem.
Or maybe your right shoulder abductors are a bit stronger than your left shoulder abductors, but BOTH sides are still quite weak and stiff. It doesn't make sense to fix the imbalance and then leave yourself weak and feeble.

Let's explore shoulder mobility.
Looking at muscle imbalances gives us a quick view into where dysfunction is hiding. To become truly functional humans, we want to optimize muscle function everywhere.
Read the full story on identifying muscle dysfunction, or get a quick refresher here: A dysfunctional muscle has trouble lengthening to its full range or producing force at any given length.
Put another way, we want muscles to have strength at every length.
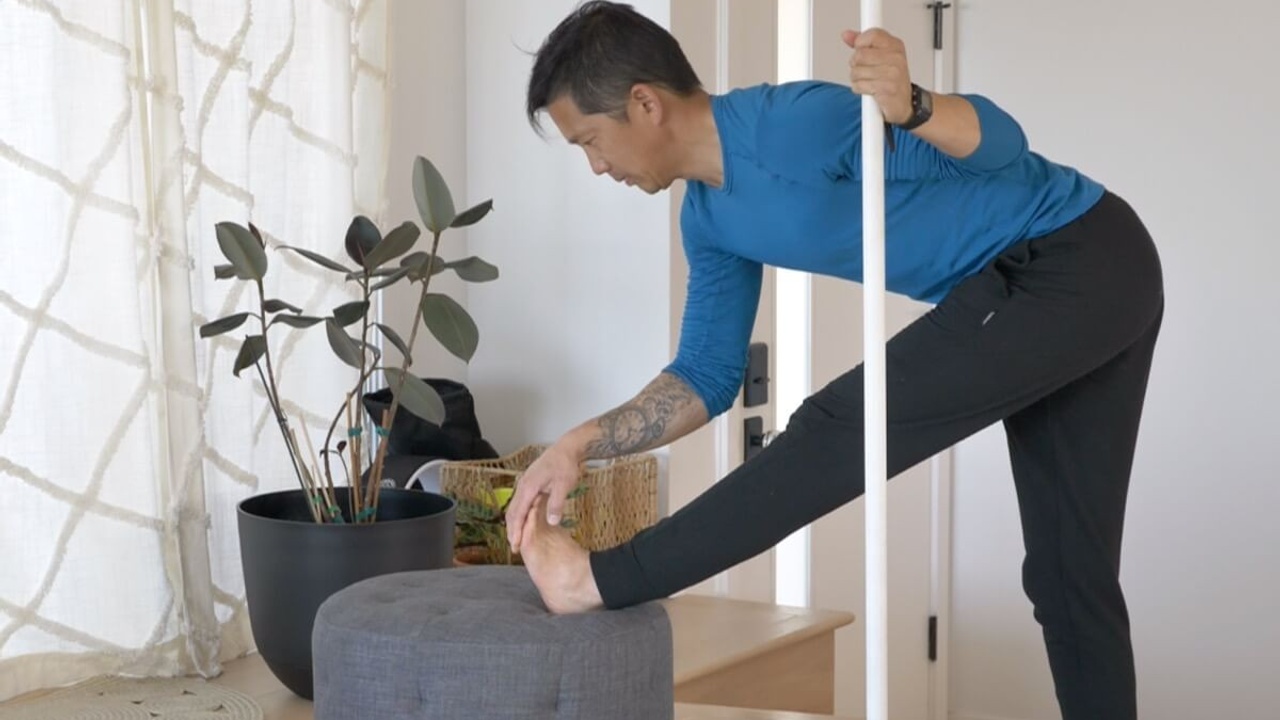
For example, many men have extremely dysfunctional hamstrings. Their hamstrings are unable to lengthen enough to allow them to touch their feet, AND their hamstrings are unable to contract strongly enough to safely shorten again without the whole body contorting and compensating. These muscles can’t achieve length; they also lack strength.
Women, on the other hand, often have hamstrings that are quite extensible. But their hamstrings are often weak and unable to shorten strongly enough to safely return to a standing position without compensation (hello, hip and back pain!). These hamstrings are dysfunctional, too; They can achieve length, but they lack strength through their full range of motion.
How Do You Fix Dysfunctional Muscles?
The quick answer: If you find a dysfunctional muscle, you want to train it back to full function.
If your hamstrings are chronically shortened and weak, you want to train them to lengthen. You also want to strengthen them in the short and long positions. You want your hamstrings to be able to contract when they’re short and long (and also in various angles).
To address this dysfunction, you’ll perform exercises and movements that challenge the hamstrings when they’re short and when they’re long (and at various other positions).
To strengthen them when they’re short, you might do something like banded hamstring curls, shown here:
To strengthen hamstring muscles when they’re long, you’ll need to teach them to lengthen AND strengthen in this position. This video demonstrates how you can do this using contract-and-relax techniques for your hamstrings:
Dysfunctional muscles need to be given a variety of challenges to recover their full function.
Constantly training your hamstrings in a shortened position will make them chronically short. Constantly stretching your hamstrings and making them relax (as some flexibility-focused practices do) will leave them weak and leave your hip joints unstable.
Again, you want strength at every length.
The same idea is true everywhere in your body. You don't want to haphazardly stretch out all your shoulder muscles without training them to produce force. Doing so would result in an unstable (and likely painful) shoulder.
Conversely, focusing on training the front of your shoulder to be short and strong without also being strong when long will make it hard for you to reach overhead, swing a tennis racket, or do a pain-free push-up!
Or, stretching your back muscles without training them to be strong will leave you feeling loose and limber, but picking up a heavy bag of groceries will become a difficult, sometimes scary proposition.
On the other hand, doing a lot of back muscle strengthening in a shortened position (like constant deadlifting) will leave you feeling like the Tin Man from the Wizard of Oz.

You want me to touch my toes???
To feel strong, flexible, AND confident, you need your muscles to be able to lengthen AND produce force in every position.
Muscle Dysfunction Cheat Sheet
In summary...
Train your muscles to achieve strength at every length.
Sensations to Pay Special Attention to When Fixing Muscle Imbalance and Dysfunction
When you start corrective exercises to fix dysfunctional and imbalanced muscles, you’ll experience a range of sensations. Some of them may worry you.
Here are several key sensations associated with muscle imbalance and dysfunction, and strategies to help you decipher and deal with them.
1) Sharp Sensations in the Muscle You’re Activating, or Uncontrollable Jitters
This is usually the one that scares people the most.
Let’s say you do an exercise that activates your inner thigh muscles. As soon as you start the exercise, you feel a sharp, intense sensation in the inner thighs! Or maybe you notice that your legs and thighs are shaking and twitching uncontrollably.
You panic and tell yourself, OH THAT’S DEFINITELY WRONG! I must be hurting myself.
Sharp sensations are usually the clearest means that bodies have of telling us that we are deeply and profoundly weak. Shakes and jitters tell us the same thing (though it feels a lot less threatening).
Sharp sensations can occur in the middle of the muscle (known as the muscle belly) or near tendinous attachments at the joint.
Sharp pains at the tendinous attachments tend to elicit the most panic. People often interpret these sensations as “joint pain,” when in fact they are simply signals from atrophied bits of muscle fiber around the joint.
Jitters and shakes tell you that your brain and muscles don't know how to efficiently handle the position you’re in. The jitters and shakes will generally involve the entire limb or a large portion of the body. It could be your leg bobbing out of control or your arm shaking as you try to put it out to the side. You're like a newborn calf trying to figure out how to fire muscles for the first time.
To fix sharp sensations or the jitters, stay calm.
You will need to learn how to activate the weak muscle(s).
2 Strategies for Activating Weak Muscles
Two things can help: self-massage and holding positions for longer periods of time.
1. Self-massage: Using a foam roller, lacrosse ball, or any other handy semi-stiff implement, knead the target muscle. This helps relax and lengthen the muscle, which will also help it function better. Learn self-massage techniques here:
While this will help, don’t think of massage as a permanent fix. Massage is a good way to manage soreness and stiffness that happens after exertion, but it’s not a long-term solution for weakness or chronic lack of extensibility.
For more details, read my article on how to relax tight muscles.
2. Longer holds: After you’ve massaged a muscle for 1-2 minutes, you should return to using it. But when you do, don't go at it with 110 percent effort. Instead, reduce the difficulty of the exercise to its easiest conceivable level and contract the muscle until you feel a duller version of the original sharp sensation. Maintain the same level of contraction for 30 seconds or more. If you can't do 30 seconds, aim for as long as you can. You may notice the muscle itself starts to quiver or shake more. Relax and rest. Then do it again. Be careful to stay just below the level where your internal alarm bells go off.
If you get the shakes in a specific position, maintain that position and see if you can contract the muscles HARDER in that position while you hold it for 30 seconds. This will stabilize things as the brain and muscles get better at producing force.

Holding the leg off the ground for 30 seconds forces the inner thigh muscles to get used to working. Your brain gets used to sending the "FIRE" command for a longer period.
Holding a difficult position for longer periods gives your brain and body time to figure out what to do.
You should feel the muscle working and sharpness transform from an alarming pinpoint sensation to a more diffuse sense of fatigue.
This transformation may take a few sets (if you’re lucky). It may take a few weeks. It may even take a few months if your body has deeply atrophied.
The key is to keep doing it.
2) You Feel the Wrong Muscles Activate
When you do any exercise, it’s important to know what muscles you should feel working. Once you know that, you can use the exercise as a solid test.
Here’s an example: You’re lying on your side trying to lift your top leg toward the ceiling. You feel your inner thigh muscles working. You feel your hamstrings working. You feel the muscles of the front of your hip working. But you don't really feel the side of your butt working.
You're using the wrong muscles!
See also: Super Basic Hip Muscle Anatomy And Movements For Beginners
The muscles best positioned to lift your leg are the ones that are facing up. Why? Because gravity is pulling your leg down. You’re fighting against gravity.
If you imagine your muscles as rubber bands, you’ll see that the only ones that can lift your leg are the ones that are facing up to the sky.
Your muscles act by pulling their ends together. They shorten to do work.
The other muscles that attach to your leg pull your leg in the wrong direction. The muscles on the front of the hip pull the leg forward. The muscles on the back pull the leg back. The muscles of the inner thigh pull the leg down toward the floor!
You must use the outer hip muscles (the ones facing up toward the ceiling) if you want to do this exercise properly.
This video, from my Healthy Hips online training and the FAI Fix (where you can get a FREE guide for fixing hip impingement), shows you how to do sidelying leg lifts:
Sidelying leg lift from Healthy Hips
But let’s say you do the exercise and instead of feeling the muscles on the outer hip activate, you feel your low back and inner thigh fire and cramp up!
Or let's say that you notice your leg keeps wanting to drift off course every time you lift it.
These are signs that you’ve got your wires crossed! Instead of simply not doing the exercise correctly, your brain is telling the wrong muscles to fire.
Misfiring muscles can be bad news. If you are walking and suddenly find yourself slipping on ice (or a banana peel), you need to be able to recruit the right muscles quickly to right the ship and stop yourself from falling.
If your brain defaults to firing the back and inner thigh muscles instead of the outer hip muscles, you’ll be slip-sliding your way home with a bruised butt or broken hip.

I guess I should've strengthened my outer hip last month!
If you feel the wrong muscles activate in an exercise, here are strategies you can use to turn on the right muscles.
- Massage: First, massage the “wrong” muscles to get them to relax. This will make it easier to get the right muscles to fire. If that doesn't help, try massaging the right muscles to get them to relax. This sometimes helps them fire better.
Pay attention to the result of massaging each muscle group. This will help you decide what to do in future training sessions. If you find that massaging makes your ability to recruit muscles worse or increases your pain levels, you know those muscles need to be strengthened more and not relaxed! - Work to fatigue: Sometimes the only thing you need to do is concentrate on feeling the right place and then do the exercise over and over again. Often you’ll feel the wrong muscles fatigue out after 15-25 reps. Then you’ll feel confused. You'll say, "hmm...now I don't feel anything..." Keep going! Readjust your focus and you’ll start to feel fatigue creep into the target muscle(s).
Congratulations!
Then take a rest until you feel ready to go again. Do the same thing with the next set. Over the course of a week or two, you’ll start to activate the right muscles without having to think about it so much.
- Try less hard but for longer: Whenever we try new exercises, there is a temptation to try SUPER HARD. When I try a new exercise, I often try to do it as high, far, and fast as I can. This enthusiasm, while laudable, means my brain tries to recruit anything and everything to get the job done so that I can impress myself (or anyone else who happens to be looking).
The result is inefficient and incorrect movement patterns.
Trying super hard is counterproductive.
If you don't feel the right muscles firing, you are doing the exercise WRONG.
If you find yourself doing this, STOP.
Instead, do the movement slower and with LESS range of motion. Hold the end position for 20-30 seconds or more, waiting for the correct muscles to give you a sensation of fatigue. Over a few days, weeks, or months, you should notice that your range of motion gradually increases. This strategy is slow-going, but reliable.
Hammering away with poor form and the wrong muscles firing is likely to lead to WORSE pain and dysfunction. So don't do it. Make sure you get the right muscles firing.
- Adjust your position: Angles matter a great deal when you’re targeting muscles. Sometimes shifting or rotating your limb or torso by five degrees in one direction will help you turn on the right muscles.
For example, in a glute bridge, if you don’t feel the right glutes firing, changing the amount of bending your knee can make a big difference. Making sure your low back is flat enough to keep your spinal muscles quiet also helps. -
Add resistance to the motion: This is the least intuitive for most people. If an exercise is hard to do properly, how would adding weight or resistance help? The simplest explanation is this: Adding weight gives sensory feedback that tells the body: “WE NEED TO PRODUCE SOME REAL FORCE OR WE’RE GOING TO FAIL.”
Resistance forces the body to recruit the muscle fibers that are most effective at producing the desired motion. It trains the right neurons and muscles to fire.
With no resistance, your body can produce some semblance of the desired motion with the wrong muscles. So it will.
By adding weight, you have increased the demand. Ineffective muscles can no longer do the job. The right muscles must work to produce more force. It’s a bit like the story of the grandma who lifted a car off her grandchild. With the right motivation, your muscles (and you) rise to the challenge.
See an example of this here:
Can-can / Standing hip flexion This exercise gets a lot harder when you add an ankle weight.
Train the muscle group that directly counters the unintended movement vector.
For example, hockey players often find it hard to perform hip extension without hip abduction. They’ve trained their hip muscles to do this constantly. This can and does lead to weakness in the inner thighs.
When trying to perform pure hip extension, their hips bias to hip abduction. No matter how much a hockey player tries to slow things down and mentally keep the movement in the pure sagittal plane, the leg moves out to the side.

Hockey players spend a lot of time in hip abduction or creating forceful hip abduction as part of the skating stride. This reinforces a pattern of abduction in many motions.
One way to clean up movement in this case is to train the inner thighs to fire while moving through the hip extension arc. This teaches all the hip muscles what to do when attempting to achieve hip extension.
This can come in both static and dynamic flavors.
For a static example, you could put your leg in different positions and fire the adductors by pushing into a stationary object.
By slowing things down, getting into controlled positions, and then asking the right muscles to fire, you can retrain movement patterns. Here’s an example in the video below, which walks you through sidelying adductor presses from my Healthy Hips online program.
Sidelying adductor presses from Healthy Hips 1 and the FAI Fix
Generally, it's a good idea to use more static exercises in the beginning. This gives you a chance to feel the right stuff firing FIRST. Then you can increase the challenge by introducing a more dynamic exercise with more range of motion.
Here’s an example of a more dynamic exercise that targets similar muscles:
We all end up with unique muscle dysfunctions and imbalances. Our childhoods, our hobbies, and our work lives influence the kinds of movement patterns we have. That means it's impossible to pick out magic exercises that will solve every individual's problem.
Experiment with all these strategies and you'll find yourself improving your ability to activate and feel the right muscles.
3) Pinching or Jamming at the Joints
Pinching sensations are common at the shoulder and hip joints, and in the low back.
I believe pinching and jamming sensations have one interpretation that yields three productive strategies that should all be applied and tested concurrently.
The interpretation is simple: Muscles aren't doing their jobs properly.
Some muscles are not achieving the right length, or they don’t have the strength to enable a smooth and pain-free range of motion.
3 Strategies for Fixing Joint Jamming
- Strategy 1: Work on the muscles where you feel the jamming.
This strategy targets dysfunctional muscles. You work on the strength and extensibility of the target muscle. This has been helpful for people with jamming sensations in their hip flexors, for example. In this case, you train the muscles to lengthen and strengthen throughout their full range, shown in the videos below.
This video shows you exercises to build hip flexor strength in a shortened position.
This video, from my online Foot Pain Fix program, shows you one potential exercise to build hip flexor strength in a lengthened position.
- Strategy 2: Work on all the muscles around the joint where you DON’T feel the jamming.
Strategy 2 approaches the problem from the muscle balance perspective. Say you have pinching and jamming in the hip flexors, but training the hip flexors directly fails to create any improvement after several weeks or months. With this strategy, you would train the muscles that create opposing motions (like the glutes, hamstrings, and even adductors).
As with training any muscle, this involves building strength in a shortened position, lengthened position, and any weak points in between.
- Strategy 3: Work on muscles around another joint
This sets a foundational structure upon which the target joint depends.
Strategy 3 is a muscle balance strategy, but on a more global scale. You look at other structures that affect the problem area.
For example, a pelvis that is constantly stuck in anterior tilt can lead to jamming sensations in the front of the hip. Or, if you have shoulder pain and a hunchback posture, you often need to deal with the hunchback first, before you can fix the shoulder pain.
See also: How to Fix Hunchback Posture
With Strategy 3, you zoom out and look at the whole body, asking yourself what else could be offsetting the body and creating undesirable, inefficient, and ineffective motion?
Then go at it.
Strategy 3 is a strong reminder that you should maintain a local and global view of the body.
The human body is an intricate machine. Parts may appear to be malfunctioning in isolation, but the entire system is interdependent in complex ways.
For example, the function of the knee joint is dependent on the function of the ankle and hip joints. The hip joints are dependent on the knee and ankle joints, as well as the spine above! And the spine is affected by the rib cage, shoulder blades, and arms relative to those shoulder blades. Your hands and wrists rely on the muscles of your elbows, shoulders, and scapulae (and therefore also the spine and hips).
Or a sprained ankle can cause a limp and offsets your entire body so much that your shoulder and neck start to hurt.
Narrowing your sights to only where you feel pain blinds you to the true causes and true abilities of your body. Remember to maintain a global view. That’s how you become a human who moves right and feels right.

You might feel the strain at the knees, but the feet, ankles, legs, hips, abs, and even neck all play a role in making this safe (DO NOT TRY THIS WITHOUT PROGRESSIVE TRAINING).
Apply Observation and Mindfulness to the Strategies
When you experience joint jamming, you should test all three of these strategies. Observe their effects over the short-, medium-, and long-term.
Sometimes you’ll only need one or two of the three. Sometimes one of the three will actively worsen the situation.
You must observe how different stimuli affect the overall comfort, strength, and mobility of the joint (and the rest of your body).
When you first start learning to listen for feedback from your body, it can be challenging. Over time, you’ll be more skillful at hearing the feedback and identifying the causes and effects.
And you will become a human who moves right and feels right.
A Shoulder Pinching Example

Ouch.
Say you cannot lift your arm out to the side. You experience pinching, jamming, and a hard stop sensation at the acromion process, the bony part you can feel on your shoulder blade.
You apply Strategy 1 and train the motion over and over again, but your range of motion never improves. The pain remains about the same, or potentially gets worse.
You apply strategy 2 and train the adductors of your shoulder joint. You try shortened and lengthened positions. This yields slight benefits after a month, but you're still frustrated.
You apply strategy 3 and look at the relationship of the shoulder blade to the spine and rib cage (and their relationship to the neck, head, and pelvis). You train the muscles around your torso to restore a more ideal pelvis-spine-rib cage relationship AND you continue to train the muscles around the shoulder joint itself. Boom. After two months of this, your shoulder feels GOOD.
Though a full “fix” may take a few months of experimentation (or longer), this is a very reliable approach. It's the approach I take in my online program the Shoulder Fix.
I’ve actually been in this exact shoulder pain situation. I was unable to fully lift my arm to the side for years.
The solution was not to keep jamming harder into the pinch (believe me, I tried). Instead, the solution was to develop better control of my spine and shoulder blades. This required training muscles that moved the spine, shoulder blades, and pelvis!
I’ve also seen this with a man in his mid-50s with a recalcitrant case of “frozen shoulder.” Injections only provided short-lived and moderate pain relief. They did almost nothing for his range of motion. He worked to free his thoracic spine and then improved control over scapular positioning. Over the course of three months, thoughts of steroid injections or surgery gave way. He basically had forgotten that he had ever had a “frozen shoulder.”

Fixing your body is like growing potatoes.
How Long Does it Take to Fix Dysfunctional and Imbalanced Muscles?
The next logical question is "Okay, how long does all this take?"
The answer is in my backyard.
Last year I planted potatoes. I took a couple of store-bought potatoes that were sprouting and buried them in some dirt.
I watered them regularly. I gave them good soil to grow in.
I waited. And I waited.
I stuck my fingers in the dirt to check if they were ready. And then I waited some more.
One day, I stuck my fingers in the dirt, and they were ready to pull out of the ground! After several months, it was like magic!
When growing potatoes (or any plant, vegetable, animal, human, etc.), there is a timeline that is not in your control. No matter how much I wanted the potatoes to grow in three weeks, I could not drastically change the timeline. I could control the basic inputs, but I couldn’t control the growth timeline.
The same is true for your body. You can control the inputs. You SHOULD control the inputs. Constantly train your body in the direction you want it to go.
But also accept that things will not always be fixed or get stronger as quickly as you hope.
Some issues seem like they resolve in a matter of days. Others can take months or years to fully resolve.
For any given area of concern, the reality is this: It will take as long as it needs to take (and that can be a while).
Sometimes that means you'll need to be doing the same few exercises for weeks, sometimes for months. Sometimes you'll need to cycle through different exercises to get the effect you're looking for. Remember that your muscles need to be trained in a variety of ways to maximize function and balance.
And you can't rush that.
If you've ever raised a child, you know that some things happen at their own pace. You may want your newborn to tell you when it wants to poo so you can put it on the toilet, but that's probably not gonna happen for a while. You may want your six-year-old to hit three-pointers on the court while under pressure, but you may have to wait until she's a little stronger (and taller).
People often get caught in an urgency trap, and think they have to seek out help from external sources. The path starts with mundane quick fixes, like more intense massages and chiropractic adjustments, and then progresses to increasingly drastic quick fixes and medical quackery, like steroid injections, PRP injections, stem cell injections, and untested orthopedic surgeries.
But you have to take responsibility for your own muscles.
We all need to recognize that the muscle dysfunctions that we have in the present are the result of all of our movement choices in the past.
If you’ve spent 25 years never raising your arms overhead, what is a reasonable amount of time for you to be able to do it comfortably?
If, for 35 years, you’ve spent 85 percent of your waking hours in a sitting position, what is a reasonable amount of time for you to balance out your hips? If your lifestyle stays the same and you continue to sit for the vast majority of your day, what effect will that have on the speed of your progress?
Having watched people improve their bodies over months and years, I can say with confidence that the time it takes to fix long-standing muscle dysfunction is surprisingly short when compared to the amount of time spent creating the dysfunctions and imbalances. If it takes you 40 years to create a problem and 2 years to fix it, that's a reasonable trade in my opinion.
The sooner you start training your body and making lifestyle changes that build you up instead of break you down, the better.
Keep Experimenting with Functional Movement
You've now learned some straightforward strategies related to muscle imbalance and dysfunction, to fix your short, stiff, and weak muscles.
It's important to remember that this process involves experimentation with different movements and exercises.
Will you run into roadblocks? Yes. But as long as you listen to your body, you'll make progress. Be consistent about the challenges you present to your muscles, and your muscles will rise to the challenge.
If you haven't already, be sure to read the first article in this series to understand How to Identify Muscle Imbalances and Muscle Dysfunction.
You may end up with pain flare-ups when fixing your muscle imbalances and dysfunctions. Understand and fix pain flare-ups.
If you're in chronic pain, learn about the philosophy that helped me heal, in my article How Shifting Your Perspective on Chronic Pain Can Help You Heal.
